
Contents
– Focus on electrical trunking
– Step 1: Define the path of the trunking
– Step 2: Attach the bottom of the trunking
– Step 3: Layout the conductors
– Step 4: Close the covers
Like hollow baseboards, trunking is a synthetic profile designed to accommodate electrical conductors. Available in several sections and finishes, they avoid the need to embed a power line in a trench. They are often used to install ceiling light and its wall switch or to install an additional outlet.
Here is how to install electrical trunking.
Trunking is composed of 2 elements:
– a bottom to be fixed to the wall or floor;
– a cover to be fitted on top.
The bottom can have a partition (fixed or added) to separate different types of conductors.
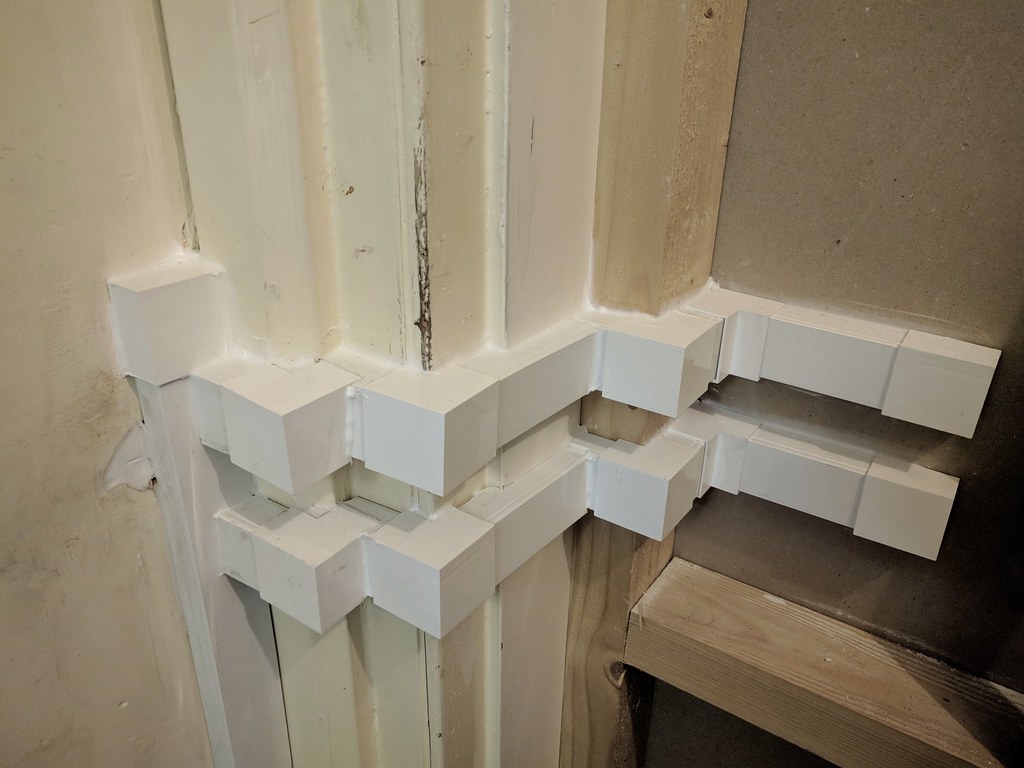
The trunking is easy to glue or staple (in plaster); it can be cut as needed: to change direction from flat to form a right angle, go around a wall angle, and complete their horizontal or vertical trajectory… As they are decorative elements, a bit like framing strips, these cuts require a minimum of care, which justifies using a miter saw.
Note: when trunking is to supply wall outlets or switches, this equipment is necessarily installed on the surface. In this case, it must have unique bases corresponding to the type of trunking used.
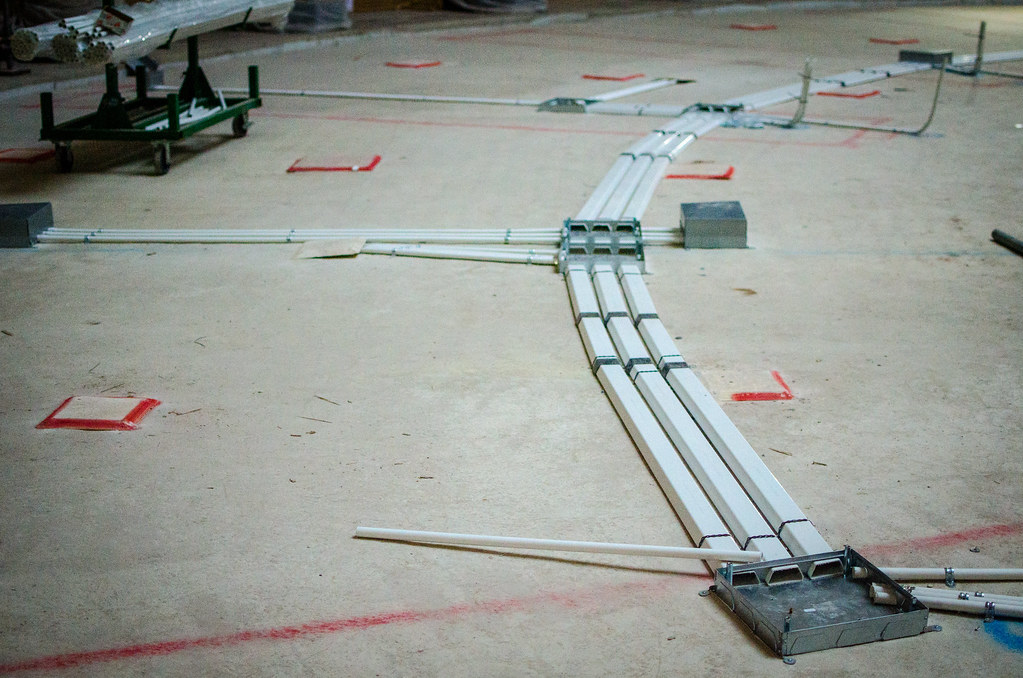
1. Define the trunking path
– Define the trunking path, which, to remain discreet, is not necessarily the shortest!
– Then, measure the corresponding lengths. And if necessary, plan the junction accessories (90°, T, etc.).
Attention: if you can install trunking quite freely, it cannot be installed diagonally. So that it doesn’t stand out too much, let it run along skirting boards, woodwork, or wall corners…
2. Fix the bottom of the trunking
– If trunking is not placed against a horizontal or vertical element (baseboard, door jamb…), draw an alignment mark with a ruler and a spirit level (or with a laser level).
– Present the 1st profile in its place to check its length if it has been shortened or mitered.
– Then staple the profile or first apply a zigzag bead of adhesive mastic on the back.
– Do the same for the following ones until the end of the chute run.
Note: For two trunking systems to meet at right angles (90°), each profile should be mitered (at 45°) so that the covers connect aesthetically. But you can also hide their junctions with cover pieces.
3. Layout the conductors
Further, it would help if you lay out the conductors at the bottom of the trunking. Of course, no conductor should be connected while doing this!
Caution: Conductors of different types must not be laid in the same trunking compartment (or in the same trunking). Those intended for strong currents (power supply for sockets or switches) must remain separate from those carrying weak currents (intercom or videophone connections, Ethernet cables…).
4. Close the covers
– Close the covers of the trunking as you go along, except for the last one.
– Then connect the conductors.
– Test the circuit after turning on the power or its protection.
– Close the end cap(s).
That’s it. You are now done with installing electrical trunking. Below is a list of the materials that you will need.
Materials needed to install electrical raceways
| Glue | Approximately $7 |
| Tape measure | Starting at $4 |
| Spirit level | Starting at $4 |
| Putty gun | Starting at $6 |
| Mason’s ruler | About $15 |
| Manual miter saw | Starting at $25 |
Please, remember to share your experience in the section below.