
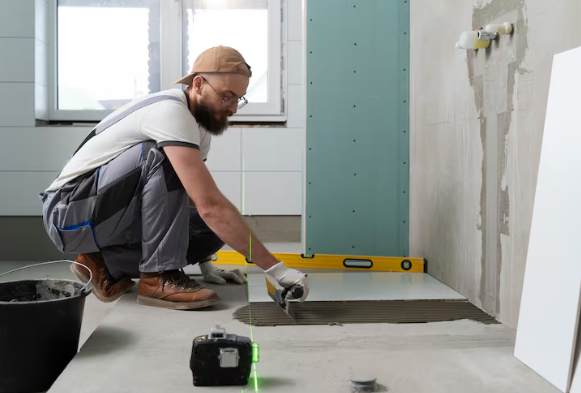
Bathroom remodeling is a project that many homeowners consider to breathe new life into their spaces. One of the most critical elements of a successful tile installation is the preparation of the subfloor. Proper subfloor preparation not only contributes to the overall aesthetics but also prevents cracking and structural failure over time. Whether you’re working with concrete, plywood, or an existing layer, knowing how to effectively prepare the subfloor can save both time and money in the long run.
Understanding the Importance of Subfloor Preparation
Subfloor preparation is the backbone of any tile installation. An inadequately prepared subfloor can lead to various issues, including cracked tiles, uneven surfaces, and ultimately, costly repairs. The moisture management, structural integrity, and levelness of a subfloor play vital roles in providing a reliable foundation for tiles.
Analyzing Moisture Levels
Moisture is a primary enemy in bathroom environments. Excess moisture can cause significant damage to both the subfloor and the tiles themselves, leading to premature failure. Before beginning the tile installation, it is crucial to assess moisture levels in your subfloor.
To check for moisture, consider using a moisture meter that can identify levels in both concrete and wooden subfloors. Ideal moisture content for wood is typically between 6-8%, while concrete slabs should have a moisture vapor emission rate of no more than 3 lbs per 1000 square feet over a 24-hour period. If the levels exceed these, it is vital to address the moisture sources before proceeding with tile installation.
Conducting Structural Inspections
Another critical aspect of subfloor preparation is assessing structural integrity. Start by surveying the area for any signs of deterioration, such as warping or soft spots.
- Check joist spacing to ensure they are evenly spaced according to local building codes.
- Perform a deflection test by bouncing lightly on the floor. Any noticeable deflection could signal inadequate support.
- Inspect the subfloor thickness. A minimum thickness of ¾ inch is generally recommended for ceramic and porcelain tiles.
These inspections will help you identify any necessary repairs or reinforcements, ensuring a solid foundation for your tile project.
Preparing the Subfloor: Steps to Follow
Once you’ve performed the necessary inspections, the next step is to prepare the subfloor accordingly. This process involves several essential actions that can set the stage for a successful tile installation.
Cleaning and Removing Old Flooring
Before laying any new tiles, ensure that the subfloor is thoroughly clean. This includes removing old flooring, adhesives, and any contaminants that may hinder adhesion.
- Use mechanical methods, such as floor grinders with diamond blades, to remove stubborn residues.
- For minor debris, a simple vacuum can suffice, but ensure that the surface is dust-free.
- Conduct a water drop test on the surface; if water beads, further cleaning is required.
Leveling and Flattening the Surface
Achieving a level subfloor is crucial for preventing lippage—where one tile sits higher than another—particularly with large-format tiles. Utilize tools like a straightedge and level to find high and low spots.
For minor variations, applying a leveling compound can help maintain a flat surface. For more significant discrepancies, consider using a self-leveling underlayment that can handle depths of up to 1 inch, ensuring a smooth surface for the tiles.
Choosing the Right Underlayment
The underlayment acts as a crucial intermediary layer between the subfloor and the tile. Choosing an appropriate underlayment can greatly influence the longevity and durability of the tiles.
| Type of Underlayment | Best For |
|---|---|
| Cement Backer Board | Wood subfloors and wet areas |
| Uncoupling Membrane | Areas prone to movement |
| Foam Backer Board | Showers and wet areas |
Each type of underlayment serves distinct purposes. For instance, a cement backer board is rigid and offers moisture resistance, suitable for kitchens and bathrooms. Meanwhile, an uncoupling membrane can help navigate movement issues, especially when applied over a wooden subfloor.
Final Preparations Before Tile Installation
After ensuring that your subfloor is clean, level, and appropriately underlayment has been installed, it’s time to conduct final preparations.
Adhesion Tests
Testing for adhesion can save you from future headaches. Conduct small pull-off tests to ensure the surface can adequately hold the adhesive. If results are unsatisfactory, consider applying a primer.
Moisture Barriers
In wet areas, applying a moisture barrier becomes essential. Products like liquid-applied membranes or sheet membranes should be used to protect against water intrusions.
Carefully follow these guidelines and ensure that every step is executed precisely. Proper preparation will not only prolong the life of your tile but also enhance the overall look of your newly remodeled bathroom. For professional assistance, consulting specialists like Gallo Rosso Kitchen and Bath Design Inc. can help you achieve the ideal results tailored to your specific needs.


